Bringing home the bacon . . .


20190422_134925John and I have been watching a few television programmes recently about our food – how it is grown, how it is produced and how it is put on the market.  Battery hens; intensive pig rearing where they can’t move about; injection of fluids into meat to plump it up and appear bigger – and more preservatives than you really need to know about!

All the above is part of the intensive farming we apparently need now to feed our growing populations (at the expense of taste and our digestive systems?) but when I was little, in Scotland, my mum used to shop at Coopers where we could buy fresh just the small amount you needed (less wastage) – loose tea and coffee and pats of butter (yes, I’m afraid I’m that old!). She would then go to the butcher (where there was sawdust on the floor and whole cows and pigs were hung up) and buy her meat. In those days, you could buy just enough for what you wanted – 2 ounces of this and that and meat by the slice – 2 or 3 of ham or 4 rashers of bacon.  In the spirit of this and the first paragraph, today’s recipe is to make your own bacon sans nitrates/nitrites.  I know I am usually giving you recipes for one but it would be a bit difficult to just make a few rashers – and it will keep for about 2 weeks – you can even freeze it (in which case, I would slice it first and put between sheets of parchment paper so you can just take out what needed)

Streaky Bacon

  • 1 piece of belly pork (I used 1 kg), preferably boned (it’s really easy to do yourself if that’s all you can find)
  • 275grams coarse salt
  • 92grams of soft light brown sugar

Mix the salt and sugar together and measure out 2-thirds and the remaining third split into 2 cups. Rub the 2-thirds into the meat all over and put into a plastic Tupperware box. Refrigerate.  After 24 hours, pour off any liquid and rub one of the remaining cupfuls into the meat again. After another 24 hours again drain off any liquid and rub in last amount of cure.  Leave for a fourth and fifth day.  It should be firm and ready!  Rinse off any excess salt and dry the belly. Wrap it in a piece of muslin.  It will dry out a little and mature over the next few days – just slice off with a sharp knife when needed.  Serve with free range eggs (my hens, of course, came up trumps as you can see).  And, I know it will be frowned on, but fried bread cooked in the remaining fat is amazing!

OLYMPUS DIGITAL CAMERA


A light supper for Spring

Image result for cheese souffle

When I was first married many moons ago, I left home (I even left country – from Scotland to England) and wanting to be the “perfect” housewife,  I started cutting out recipes and sticking them in an exercise book.  I copied others and scrounged some from other people and begin to build up a library.  Some of them are written in my mum’s handwriting (she died over 20 years ago and I always look at them with a smile), some are in my daughters’ beautiful scripts – and many pages are covered with splodges of this and that!  I now have 4 of them and still collecting and it’s been interesting looking back to see have food tastes have changed.  The ones in the beginning are all meat and 2 vegish and more up to date ones lean towards fish and vegetarianism.  I went right back to the beginning, though, and found one of the first things I ever made – as a treat to mum.  In my naivety, I never knew soufflés were supposed to be difficult – but it turned out absolutely fine – proving that if you go into something scared it will more often that not not work out; but if you go into it convinced it will work, it will!

Cheese Souffle for One

5g Parmesan cheese (a tiny end bit should be enough; you only need it for the dish)
15 – 20g butter, plus a little more for the dish
15g plain flour
125ml milk (you may need a little less or more depending on how wet/dry your butter/flour paste is)
sea salt and black pepper
60g Cheddar/Gruyère cheese
1 egg and 1 egg white (did you know you can freeze egg yolks? Put them in a single container, cover with a little water and freeze. When you have enough you can defrost them and make some ice cream!)

Preheat the oven to 200°C/180°C fan/gas 6.
Grate the Parmesan for the dish and the Cheddar/other hard cheese. Separate the whole egg (break and toss the yolk between the halves letting the white drop out) and put the two whites into a bowl you can use for whisking. Lightly butter a large ramekin or soufflé dish and sprinkle in the Parmesan. Melt the rest of the butter in a saucepan over a medium heat and, once completely melted, stir in the flour and beat them together until you have a smooth thick paste. Stir this over the heat for a couple of minutes until the flour is cooked. You may need to add a little more flour if it seems too wet, or a little more butter if it seems too dry but don’t overdo it because the more you add the more milk you will need and you may end up with far more cheese sauce and soufflé than you wanted! Now take the pan off the heat and gradually add the milk, stirring in each addition before adding more. At first, it will be quite thick and lumpy but it will start to thin as the milk is added and, if it remains lumpy, add a drop more milk or use a whisk instead of a spoon to help it along.
Once you have a smooth sauce, return the pan to the heat and gently bring the sauce to the boil (it will start to bubble and look a bit like lava), stirring all the time, until it starts to thicken. Beat in the grated cheese with some salt and pepper and add more cheese to taste if it’s not strong enough for you. Take it off the heat and leave it to cool. It’s important to leave it to cool because the raw egg yolk will be added to it and, if it’s too warm, you’ll end up with scrambled egg cheese sauce not soufflé!
Once the sauce is much cooler (I think it’s cool enough when I can taste it without burning my finger) beat in the egg yolk. Finally whisk the egg whites to soft peaks (thick and foamy but still slightly droopy) and fold them into the sauce. Tip the sauce into the prepared dish and bake for about 15-18 minutes. Have a quick peek at 15 if you’re feeling brave and, if still very wobbly, leave it for a few more minutes. Serve with a green salad and give yourself a pat on the back!


Rhubarb . . Rhubarb .. Rhubarb

Image result for rhubarb

If you ever get a chance to visit Ludlow, in Shropshire, go!  It is the most beautiful market town, almost into Wales, full of original old buildings, a castle and a thriving market on nearly every day, bar Sunday.  There are hardly any chain shops and it’s all about independent trading and looking out for one another.  John and I visit regularly and part of me always want to stay!  Apart from catching up with friends, the other reason we love it is that there is a wonderful café on the bank of the river where amazing meals are served and is so welcoming!  It is quite small inside but there are some seats and tables outside overlooking the water – and, if you are a little cold, are provided with hot water bottles and a blanket!  Apart from the food, they make the best hot rhubarb cordial – only served seasonally, so you have to make the most of the growing time and go often!  The rhubarb in my garden is growing really well this year (I remembered this time to net it over to stop the hens eating the leaves!) so I thought it would be fun to have a go making it myself.

The health benefits of rhubarb include its ability to improve digestion, stimulate bone growth, boost skin health, improve circulation and metabolism and full of fibre, vitamin C, K and B, and calcium. So let’s make the most of its time and as well as making crumbles and pies, bottle up some cordial and enjoy with either hot or cold water, sparkling water – you can even serve it with prosseco!

Rhubarb Cordial

  • 450g rhubarb, chopped
  • 225g sugar (I know it seems a lot, but remember you are going to dilute it and don’t need a lot)
  • 300ml water
  • 1 orange, zest and juice
  • 1 lemon, zest and juice

Put the sugar and water into a large saucepan.  Add the rhubarb, zests and juices and bring to the boil.  Cook until the rhubarb is completely mushy (technical term!).  Put a piece of muslin over a large bowl (I secure mine with an elastic band) and pour the liquid and fruit into it.  Leave it to drip through overnight. Bottle and keep in the fridge (I have no idea how long it will last as it seems to go as fast as I can make it, but I would think about 1 week to 10 days)

PS if you want to make more, I work on a ration of half sugar to weight of rhubarb and up the water slightly. 

You can be Masterchef!

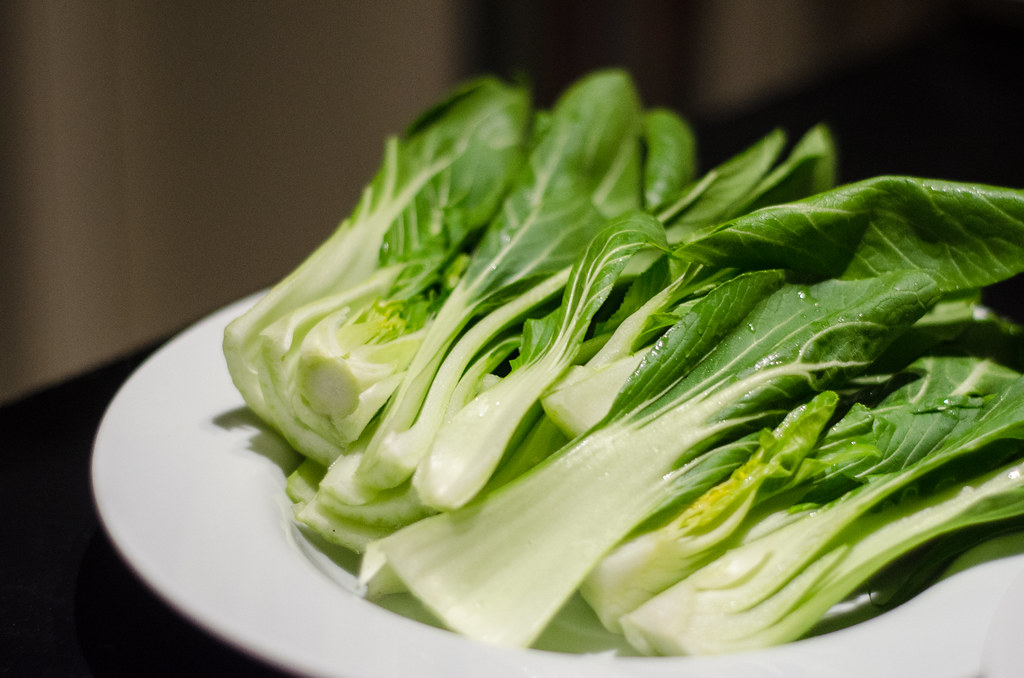
Image result for pak choi

Masterchef (the amateur one) is on our television just now – and it’s finals week so doubly glued!  I much prefer this to the professional one and love watching how they all develop their own styles and learn new tricks and recipes.  I always get (even more) enthused with my own cooking and trying out new recipes on John.  The following dish is (apparently) the best thing I have ever made!  Obviously, I made enough for the both of us but I have tweaked it just for one – although today might be the day you invite a friend over and show off your new skills – in which case, just double up?

CHINESE CRISPY BEEF

FOR THE BEEF

  • 200g beef topside or rump steak, sliced into strips
  • 1/4 tsp black pepper
  • 1 tbsp soy sauce
  • 3 tbsp cornflour
  • 2 tbsp vegetable or rapeseed oil

FOR THE STIR-FRY

  • 3cm piece of fresh ginger, grated
  • 2 cloves of garlic, grated
  • 2 spring onions, cut into 2.5cm lengths
  • 1 long red chilli, sliced at an angle
  • 1/4 tsp black pepper
  • 3500g pak choi, leaves and stems separated, both roughly chopped
  • 2 tbsp Shaoxing rice wine (you can use sherry if you haven’t any)
  • 1 – 2 tbsp. soy sauce
  • 1 tbsp sesame oil
  • 75g beansprouts

In a bowl, toss the beef strips with the Sichuan pepper and soy sauce, then leave to marinate for 10 minutes. Put the cornflour into a bowl, add the beef and toss to mix. Heat 1/2 tbsp of the vegetable/rapeseed oil in a large wok over a high heat until the oil is smoking. Place a third of the beef in the wok and stir-fry for 2 minutes, until crispy. Remove with a slotted spoon and set aside on a plate. Repeat with the rest of the beef, using the remaining oil, transferring each batch to the plate once it is cooked. Add the ginger and garlic to the oil in the wok (from cooking the beef) and stir-fry for 1 minute. Add the spring onion, chillies, pepper and pak choi stems, then stir-fry for 2-3 minutes. Add the rice wine, soy sauce, sesame oil and 2 tbsp water. Stir-fry for 2-3 minutes, then add the pak choi leaves and beansprouts. Stir-fry for another 2 minutes until everything is cooked. Serve in warmed bowls, topped with the crispy beef  and sesame seeds, if liked.  Depending on how hungry you are, you can eat it as is or with rice or noodles.


Luscious Lemons

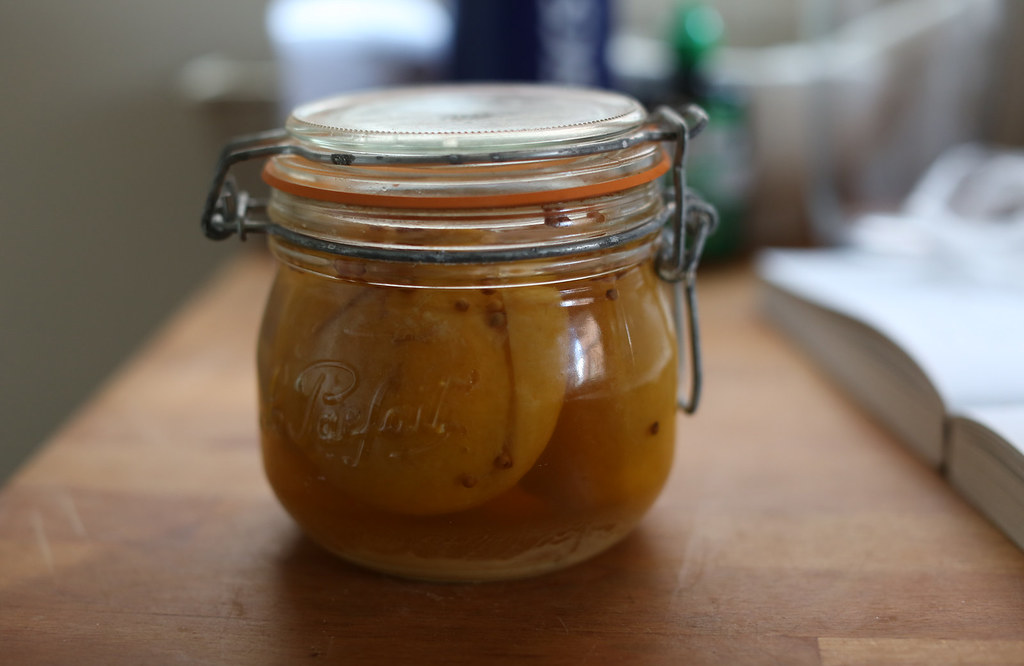
Image result for preserved lemons

When I first discovered the deep, citrussy undertone preserved lemon brings to recipes I became a little bit obsessed with it, and worked my way through a whole jar in no time at all. It’s a traditional ingredient in North African cooking, where it’s used in tagines, but I found myself using it for all sorts of things from fish, seafood, poultry, roasted vegetables and pasta dishes. I love just stuffing some into a chicken before roasting it, then basting the bird with the lemon-infused juices. You can, of course, buy them ready made in a jar (now where’s the fun in that!) but they’re incredibly easy to make very well yourself. You just need a little bit of patience for the salt to work its magic before you can enjoy the brilliantly intense flavour. Make a jar and keep it in your fridge; it’s a beautiful glowing, golden thing and makes a great gift for friends too

A jar of preserved lemons

  • 130g sea salt
  • 100g caster sugar
  • 5 large unwaxed, lemons, washed, sliced finely, pips discarded
  • 1 tbsp olive oil

Mix the salt and sugar and scatter a pinch of it into the preserving jar. Dip one side of the lemon slices in the salt and sugar mixture. Layer, salty-side down, in the jar. Occasionally scatter some more of the mixture on top. Press the layers down to squeeze in the remaining lemon slices, until you’ve reached the top of the jar. By the end, the juice and self-made brine should completely cover the layers. Top with the oil, ensuring none of the lemon is in contact with the air. Seal the jar. Refrigerate for up to 2-3 months.

And one recipe – more to follow (I wouldn’t want you to go to all the trouble above and then not use them!)

Spiced Butternut Soup with Salted Lemon

  • 1 onion, chopped
  • knob of butter
  • 1 tablespoon olive oil
  • 1 garlic clove, peeled and chopped
  • 10g ginger, peeled and chopped
  • 1 leek
  • 250g peeled butternut squash
  • 1 red chilli (size depending on how much you like your heat!), sliced
  • 2 preserved lemons
  • 1 tablespoon flour
  • 1 litre chicken or vegetable stock (yes, I know this is going to make more than enough for one but soup is really worth making a batch of and keeping a jug in the fridge)
  • coriander (if liked)

Melt the butter with the olive oil and add the onion. Cut the leek into 1cm pennies and chunk the squash. Halve the lemons, take out the pips and slice into baton.  By now, the onion should be nicely cooked so stir in the garlic, ginger and leek and cook for about 5 minutes.  Dust with the flour and stir in the stock, squash, chilli and lemons.  Increase the heat, stirring to a simmer.  Half cover the pan and cook till soft. Add the coriander at the end, if liked, before serving.

Meatless mushrooms

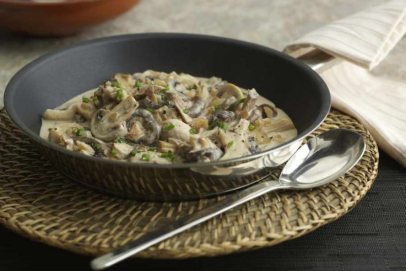
mushroom_stroganoff_825_551_84_int_c1

According to recent articles in newspapers and magazines, a majority of us are turning from meat eaters to vegetables and fish.  This is definitely true in our household (gearing up with the seed catalogues for my spring vegetable planting!) and we try to eat 2 or 3 times a week vegetable and/or certainly fish dishes. It is difficult sometimes to make it all not so bland though so I am really hoping you will find this (meaty without the meat) mushroom dish will tickle your tastebuds!

Mushroom Strogonoff

  • 1 small red onion
  • 1 -2 garlic cloves, grated
  • 1/2 teaspoon smoked paprika
  • 1/2 teaspoon English mustard
  • 120 – 150grams quartered mushrooms (this can be all chestnut or mixed mushrooms)
  • 1/2 vegetable stock cube dissolved in 125 ml hot water
  • 1/2 pot crème fraiche or 1/2 pot sour cream (if you haven’t got either but you do have cream just add a little lemon juice and leave to stand a few minutes)

In a wide based pan, melt a little butter and oil and gently cook the onions and garlic.  Add the mushrooms and seasoning and cook without stirring until caramelized.  Add the stock, paprika and mustard and cook for another few minutes.  If it seems a little too liquidy, cook hard to reduce it. OFF the heat, add the crème fraiche/cream and stir altogether.  Traditionally, this is served with boiled rice but I have also served this with linguine and other pasta types so this bit is up to your own creative genius! Sprinkle with parsley – and, for an extra layer of texture, quartered slices of fried bread (in butter, of course!)

Take three . . . .

20190228_162958

For those of you who have been following for a while, you will know that this blog is all about getting you interested in the shopping, cooking and, of course, eating of good food.  It’s not about the speed of doing it nor batch baking “to save time” (be honest, how many of you have unlabelled bags/boxes in your freezer the content of which you have no idea?).  However, sometimes, I make up a recipe that is so ridiculously non-challenging and moreish, that I just have to pass on!

John and I went out to dinner a few days ago (even people who love cooking like eating someone else’s!).  He ordered a cheese and leek pate – and it was so delicious I asked the waiter if he could ask the chef for the recipe (I’ve done this a few times and usually manage to blag them!).  Back came the answer that he would give me the ingredients – gelatine, eggs, cheese, leeks, butter etc but not the “how to”! I thought it about it on the way home, did a couple of  experiments and this is the result.  You will never make anything so tasty and so easy in such equal measurement!

Ailsa’s Cheese and Leek Pate

  • 1 leek (only the white and pale green parts. I was also making some mashed potato at the time so put the darker parts in with that! Waste not, want not . . . )
  • knob of butter
  • 200g packet of cream cheese (I only used about 2/3 of it – you never know when a bagel with cream cheese and smoked salmon is the only thing to satisfy)

Cut the leek up into thin slices – I cut down the middle and then slice.  Melt a little butter in a pan with some salt and coarse pepper.  Saute the leek very slowly until soft (keep an eye on it and move around the pan as you don’t want it to burn).  Put the cream cheese in a bowl, tip over the hot leek and blend with a stick blender until pate-like. Put into a small bowl (if you want to be super-posh in your serving, line a small tin with cling film and spoon it in  – when set in the fridge you then tip it out and slice like a cake on a plate with salad and bread).  Personally, I just eat it almost immediately with crusty bread/toast/or favourite crispbread!

Wild garlic

Beloved Sir and I have just had a great 24 hours near Tenby, South Wales.  We stayed in a lovely hotel with the most beautiful outlook over the estuary (see below). 20190223_084230

We went for a walk – and found a carpet of wild garlic:

garlic

so it was back to the car for a bag to collect it!  Dense clusters of green spears thrust from the woodland floor in spring and are a sign that the woodland you are walking in is very old. This lovely weather must have brought it out early and I couldn’t wait to get home to make soup with it.  I know I am usually asking you not to batch make but it has to be done in this case as the season is really short. This recipe is enough for 4 but freezes beautifully! Not only is it delicious but also helps lower cholesterol and high blood pressure!

Wild Garlic Soup

  • 1 onion sliced
  • 2 – 3 potatoes (these are for thickening the soup so depends on size)
  •  500 ml water
  • stock cube (I use a vegetable one)
  • milk/crème fraiche/cream

Saute the onion in a little butter in a large saucepan.  Add chopped potato, stock cube, and water and bring to the boil.  Cook until the potato is soft.  Lay 3 – 4 handfuls of the garlic leaves on the top and allow to wilt and cook for 2 – 3 minutes. Cool slightly and, using a hand blender, puree.  Put back into the saucepan and add milk or cream or creme fraiche to taste along with plenty of pepper.  It never lasts long in our house but will keep in the fridge for 2 – 3 days – or ladle into bags to freeze.  Serve with crusty bread and a dollop of creme fraiche.

You might like to try this, too, to add to any other flavoured oils you may have

Wild Garlic Oil – blanch several handfuls of leaves in boiling water for 5 – 10 seconds then immediatly drain and toss into iced water (this keeps the colour). Drain again and wrap in an old tea towel and squeeze all the liquid out. Chop up into small pieces and put in a jam jar or bottle and top up with 150 ml of olive oil.


Happy Anniversary!

This week celebrates a whole year of recipe blogging!  Who knew when I started that I would have followers from USA, Canada, Australia, Germany, France, Ireland and even the United Arab Emirates!  I really hope it has all been worth it and many of you have (re)found a love of cooking – and are now actually doubling up to have a friend or two over.

This recipe is stupid easy. All you do is toss everything together, put it on a baking sheet, pop it in the oven and you’re done.  It’s also definitely one you can double, even quadruple up and as its so simple will give  you plenty of time to uncork a bottle or two and enjoy your guests.

Tray chicken curry  with pickled onions

  • 2 cloves of garlic, grated
  • 1 – 2 tsp curry powder
  • 1/2 tsp garam masala
  • 1/2 tsp ground turmeric
  • 1 tsp grated fresh ginger
  • 2 tbsp coconut oil (you can use olive if you haven’t got any)
  • 2 chicken thighs, skin on
  • 1/4 – 1/2  head of cauliflower, cut into florets
  • small whole tomatoes
  • Coriander leaves, to garnish

*Pickled Onions

  • 1 medium red onion, thinly sliced
  • 1 tbsp whole black peppercorns
  • 1 tsp salt
  • 1 clove of garlic, crushed
  • 1 star anise pod
  • ½ tsp coriander seeds
  • 300ml-330ml apple cider vinegar
  • pinch of sugar

First, make the pickled onions. Put the onion slices in a medium bowl and set aside. Combine 170ml water, the black peppercorns, salt, garlic, star anise and coriander seeds in a small pan and bring to the boil. Remove from the heat, add the apple cider vinegar and sugar, then pour directly over the onions. Leave to cool, then chill in the fridge. The pickles are ready to eat as soon as they’re cool. These should last for a few days stored in a covered jar or bowl in the fridge.

Heat the oven to 200C (220C non-fan). Line a baking sheet with parchment paper.  In a large bowl, combine the garlic, curry powder, garam masala, turmeric, ginger and coconut oil and work them into a paste. Toss the chicken and cauliflower in the paste to coat. Spread the chicken in an even layer on the prepared baking sheet. Roast for 15 minutes, then add the cauliflower and tomatoes and roast for another 15 – 20 minutes. Serve topped with the pickled onions and coriander leaves.

* you can, of course, miss out the onions but they really do add to the dish.  You can put any left in a jam jar in the fridge and they will keep for a week or so.  I am sure you (now) talented cooks will find lots of other dishes to eat them with – even if it’s only cheese and biscuits!

pooksLove from Pookie and I (she’s 19 this year but still going strong!)


Happy New Year!

Happy new year, pig 2019, Chinese new year greetings, Year of pig

Today, 5 February, is Chinese New Year and the start of the Year of the Pig, the 12th in the 12 year cycle of Chinese animals. Myth has it he came late to a party called by the Emperor because he overslept!

I thought, at first, I might not be able to do a Chinese dish as most dishes seem to involve lots of different platters and people – but I think you will find this one completely fits the bill cooking for one – but can easily be doubled/quadrupled up if you invite some friends over the New Year.  And so much better for you (and cheaper) than a takeaway!  It uses a traditional Chinese method of pouring extremely hot oil (BE CAREFUL!) over the dish just before serving to really bring out the flavour.

Baked Cod Loin with sizzling spinach, ginger and chilli

  • 1 cod loin
  • 12 mls rice wine (or sherry)
  • 1 tablespoon soy sauce
  • 1 garlic clove, crushed
  • 150g baby spinach leaves
  • 2 salad onions
  • 5g fresh root ginger
  • 1 small red chilli, deseeded (use the seeds if you like it HOT)
  • 12ml sunflower oil

Preheat the oven to 200oC, gas mark 6.  Place a large sheet of foil on a baking tray and sit the cod on top.  Drizzle over the rice wine, 1/2 soy sauce and the garlic.  Massage the dressing into the fish and tightly seal the foil parcel.  Bake in the oven for 12 minutes or so.  Meanwhile, cook the spinach for a few minutes in some boiling water until wilted and drain.  Cut the onion into small lengths then into small slivers.  Do the same with the ginger and chilli.  Dilute the remaining soy sauce with 1 tablespoon of boiling water.  Arrange the spinach on a plate.  Top with the cod and any cooking juices.  Heat the oil in a pan over a high heat.  Pile up the ginger, onion and chilli onto the cod. When the oil is extremely hot, almost smoking pour it over the fish and vegetables so that it sizzles.  Pour over the diluted soy sauce and eat immediately with a salad of tomato, onion and beansprouts.  Yum yum!